You can control your smart home via home assistant with your mobile phone and with many other devices, but recently I started a new project to use a tablet as a wall panel for central control in my home.
Fully Kiosk browser enables specific webpages (home assistant) to display full screen, it also gives capabilities such as auto-unlock based on the webcam and avoid any distractions.
Watch a demo of my wall panel below:
If you are ready to build your own dashboard in home assistant then checkout this video:
Table of Contents
Enable development mode on Fire Tablet
On your Fire Tablet we need to enable the development mode, this will enable us to do some advanced configuration.
To enable it go to Settings, Device Options, About Fire Tablet, tap around 5 times on Serial Number until you have the enabled it.
Now go back and open the Developer Options menu, and turn on developer options, tap ok on the message box. Scroll down and toggle USB debugging mode this will enable you to use the android toolbox if you needed it.
Fully Kiosk Browser
Open a browser on your fire tablet with the silk browser and search for “fully kiosk fire os”. You should land on a page with the downloadable files.
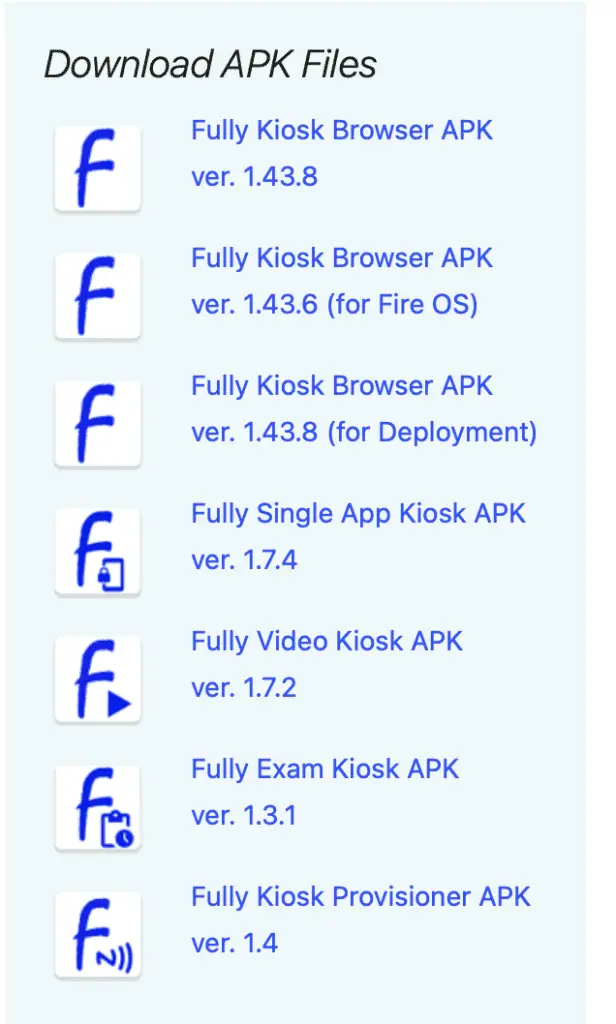
As you can see on the right hand side you have various options tap and download “Fully Kiosk Browser APK for Fire OS“
Once downloaded, allow any permissions issue regarding the fact that you are downloading a piece of software that isn’t from the official store. Now you should find a similar page:
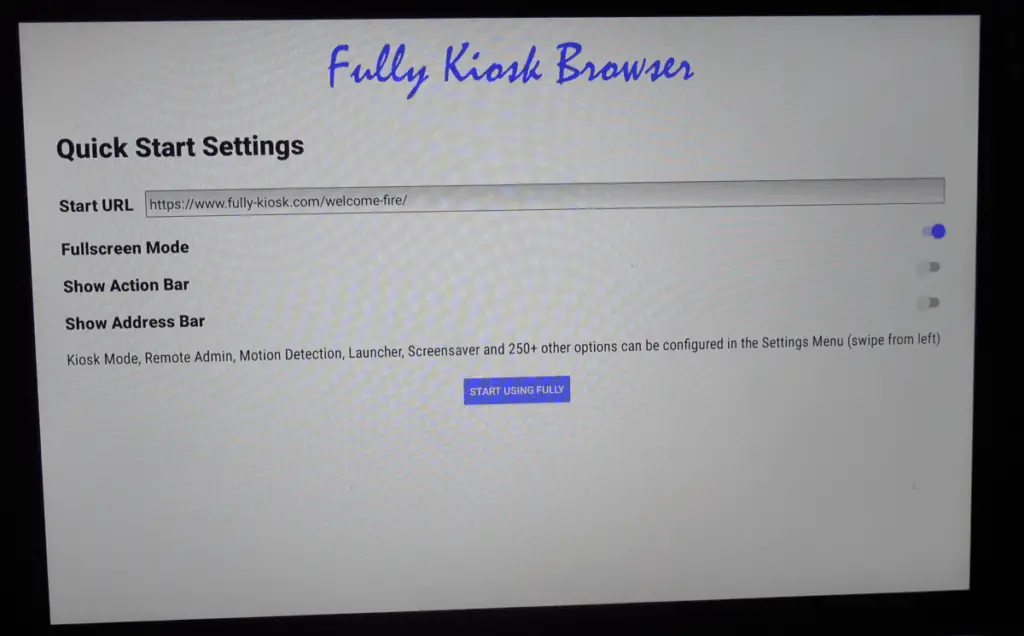
Now swipe left to right and click on settings, you will see a lot of configurations and this is the power of the fully kiosk app.
There are two main type of options, with or without plus. You can pay for a plus subscription to unlock plus features. If you don’t pay for a licence then you will have a watermark on the tablet. This enables you to try things out before actually committing to a purchase.
Let me show you now the basic configuration that you need to do while you are still using your fire tablet. More advanced settings can be done by the confort of a laptop thanks to fully remote management.
Fully Kiosk Basic settings for Home Assistant
| Web Content Settings | Start URL | http://HOME_ASSISTANT_IP_ADDRESS:8123/dashboard [http://192.168.1.225:8123/lovelace-ipad/0] |
| Username | fireos | |
| Password | xxxxx | |
| Remote Administration (PLUS) | Enable Remote Administration | ON |
| Remote Admin Password | xxxxx | |
| Remote Admin from Local Network | ON | |
| Enable File Management on Remote Admin | ON | |
| Enable Screenshot on Remote Admin | ON | |
| Enable Camshot on Remote Admin | ON |
Fully Kiosk Advanced Settings
These settings can be done from the remote logging, open up a browser on your pc:
Type this in: http://192.168.1.71:2323 replace the IP address with your own, I recommend you use a fixed IP address from your router.
Login with your username and password that you set in the remote admin setting.
| Web Browsing Settings | Enable Pull to Refresh | ON |
| Enable Back Button | ON | |
| Load Start URL on Home Button | ON | |
| Animate Page Transitions (PLUS) | ON | |
| Wait for Network Connection | ON | |
| Advanced Web Settings | Keep Screen On while in Fullscreen Mode | ON |
| Device Management | Keep Screen On | ON |
| Screen Orientation | Landscape | |
| Force Screen Orientation Globally | ON | |
| Unlock Screen | ON | |
| Screen Off Timer (PLUS) | 10 | |
| Launch on Boot | ON | |
Motion detection is used to turn on the screen when you approach it, this is used by the front camera or by the microphone
| Motion Detection (PLUS) | Enable Visual Motion Detection | ON |
| Detector Sensitivity | 90 | |
| Detector Frame Rate | 5 | |
| Darkness Level | 10 | |
| Enable Acoustic Motion Detection | ON | |
| Acoustic Detector Sensitivity | 20 | |
| Turn Screen On on Motion | ON | |
| Exit Screensaver on Motion | ON |
You can also setup device detection movement, which is an anti theft feature to prevent your tablet from being moved off its stand. In my case I have the tablet on a flexible arm and do remove it and use it so I haven’t enabled this option.
In addition, if you ever wanted to fully lock down the device just to the fully kiosk page (home assistant in my case), then you can do this. I’m not going to do it at this stage.
Licence
One time payment for a device is around €6.9 would remove all watermarks if you are using PLUS features. In my opinion it is worth paying for. You can also get a monthly subscription full details are here
Other Fire Tablet Settings
Setting, Security & Privacy, Disable Lock Screen and confirm your pin.
This will enable you efficient unlocking of the device without a pin. This also means that anyone can use the device!
Fire Tablet Toolbox (Optional)
You can unlock some potential in your fire tablet by downloading the fire toolbox. This is compatible with windows computers.
I will show you how you can install the Google Store (which is not on fire OS by default) and to de-bloat the device.
De-bloating means removing unnecessary apps (standard amazon fire app.) This should enable the tablet to run smoother and to consume less battery.
Launch the fire toolbox
- Manage Amazon Apps.
- Disable amazon apps –> Standard Debloat (recommended).
- Execute.
Install Google Services:
- Google Services.
- Execute tools.
Integrating Fire Tablet into Home Assistant
There are at least three good reasons to integrated your fire tablet running on Fully Kiosk browser into Home Assistant.
Tablet sensors: give us information about power level, IP address, home page, etc.
Tablet settings: this is all of the settings that you can change from the fully kiosk url more than 250, you can pick and choose whichever you want.
Tablet commands: change the settings from home assistant itself.
First add in the secrets.yaml
Replace the IP address and the password!
kitchen_fire_tablet_url: http://192.168.1.71:2323/?cmd=deviceInfo&type=json&password=smarthomemakers

kitchen_fire_tablet_command: "http://192.168.1.71:2323/?cmd={{ cmd }}&key={{ key }}&value={{ value }}&type=json&password=smarthomemakers"

kitchen_fire_tablet_settings: "http://192.168.1.71:2323/?cmd=listSettings&type=json&password=smarthomemakers"
Then in configuration.yaml
  #Fire Tablet
sensor:
  - platform: rest
    name: kitchen_fire_tablet
    json_attributes:
      - ip4
      - batteryLevel
      - isPlugged
      - plugged
      - kioskMode
      - screenBrightness
      - motionDetectorState
      - maintenanceMode
      - appFreeMemory
      - appUsedMemory
      - totalFreeMemory
      - totalUsedMemory
      - mac
      - startUrl
      - currentPage
      - screenOrientation
      - screenBrightness
      - screenLocked
      - screenOn
      - batteryTemperature

    resource: !secret kitchen_fire_tablet_url
    value_template: "{{ value_json.screenOn }}"

  - platform: rest
    name: Kitchen Tablet Settings
    json_attributes:
      - timeToScreenOffV2
      - screenBrightness
      - microphoneAccess
      - motionSensitivity
      - motionDection
      - motionDetectionAcoustic
      - motionSensitivityAcoustic
      - screenOffInDarkness
      - darknessLevel
    resource: !secret kitchen_fire_tablet_settings
    value_template: "{{ value_json.startURL }}"
    scan_interval: 10
Automation Ideas
Doorbell chime
I created a simple dashboard that shows my doorbell feed that I want the fire table to show when someone presses the doorbell.
Please replace with your device ID, best way to get this is to build the automation first with the UI and use device as a trigger type. Also replace your URL with the dashboard that you want to show.
After 1 minute I set it back to the default dashboard.
- id: '1642688464338'
  alias: Doorbell Pressed
  description: ''
  trigger:
  - platform: device
    device_id: 1921c6edd5a36ff852987602f898c921
    domain: nest
    type: doorbell_chime
  condition: []
  action:
  - service: rest_command.kiosk_command
    data:
      cmd: setStringSetting
      key: startURL
      value: http://192.168.1.225:8123/lovelace-ipad/nest
  - delay:
      hours: 0
      minutes: 1
      seconds: 0
      milliseconds: 0
  - service: rest_command.kiosk_command
    data:
      cmd: setStringSetting
      key: startURL
      value: http://192.168.1.225:8123/lovelace-ipad/0
  mode: single
Nothing stops you doing a similar automation perhaps with a baby monitor.
Next Steps
I’ve made a course all about dashboards in home assistant where I go in much more detail!
You can find all my courses at: https://courses.leonardosmarthomemakers.com/collections