Node-RED is a graphical tool that can be used to create flows for smart home automations. Many use Node-RED in combination with Home Assistant which is an open source home automation platform, to get the best of both worlds. The most common way to connect Node-RED and Home Assistant is via the add-on, in this article I’m going to show you an alternative way which will give you much more flexibility and control.
To install Node-RED on a Raspberry PI, you will need the Raspberry PI OS installed (formally known as Raspbian), then connect via terminal and execute some commands to extract and install Node.js and Node-Red. To connect home assistant and Node-RED you need to generate a long lived token on HA and add that in the server configuration in the nodes in node red. At this point you can import your flows from JSON, that you created previously.
By the end of this post, you will have a fully running instance of Node-RED on your PI!
Table of Contents
WHAT DO I NEED TO DO THIS PROJECT
- Raspberry pi, at least version 3b+
- Ethernet Cable
- 32 GB SD card
- Card reader if your pc doesn’t have one
- Power supply
HOW TO INSTALL RASPBERRY PI OS
Take the SD card and put it into your computer, use a card reader if don’t have an SD slot.
Now download the Raspberry PI Imager here –> https://www.raspberrypi.org/software/ you can install this on Mac, Windows or Ubuntu.
Once installed the imager, it is time to install the operating system.

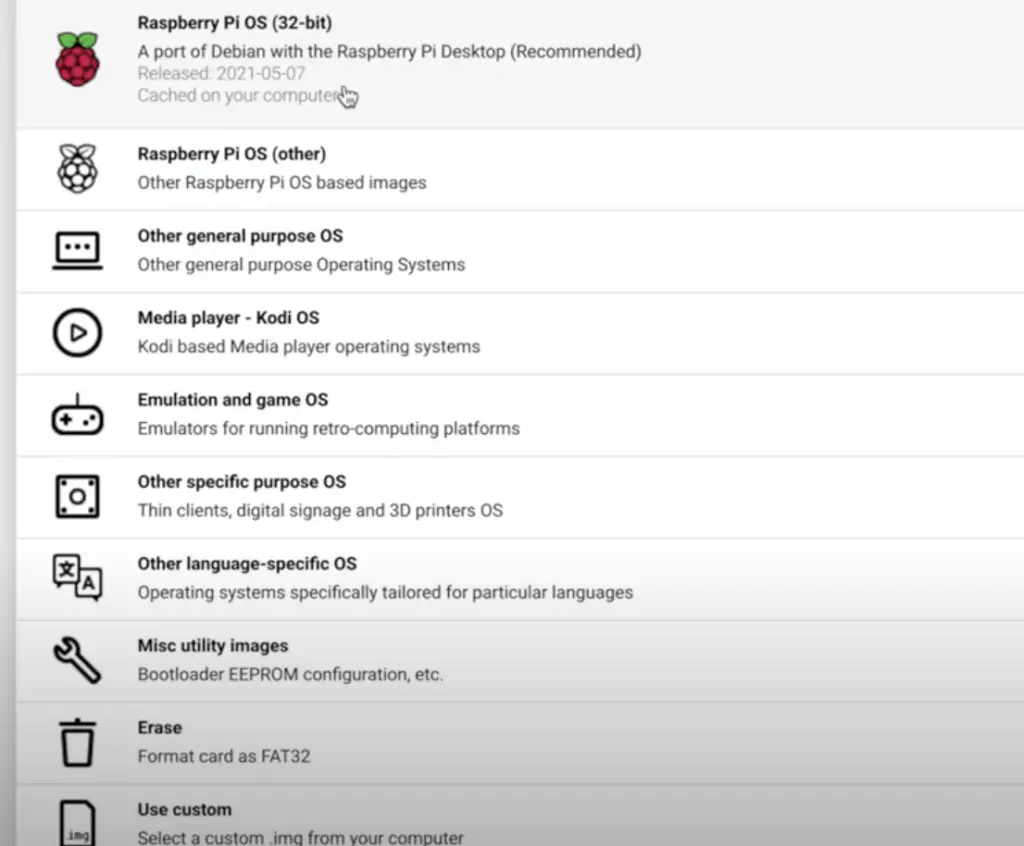
Click on “choose os” select Raspberry PI 32-bit.
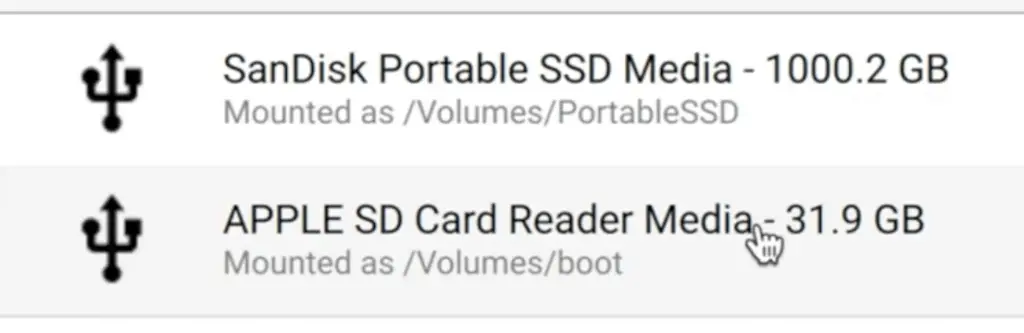
Now click on “choose storage” and find the SD card, look for the brand of the card and the memory that you purchased. Remember that this will ERASE all contents on the card. In my example APPLE SD Card Reader Media.
Click on write, this process will take up to 5 minutes.
ENABLE SSH ON RASPBERRY PI
At this stage we need to connect to your raspberry pi with a computer, before we can do that we need to use a terminal on Mac or CMD on Windows via SSH.
Go to a text editor and create an empty file with ssh (no extension), save it in the sd card. If you can’t see the SD card anymore it might have been ejected, just simply plug it back in. (check that the file hasn’t got a .txt at the end).
Now we are ready to eject our SD card and put it in our Raspberry PI. Connect the PI to an ethernet cable and a power supply.
FIND IP ADDRESS OF RASPBERRY PI
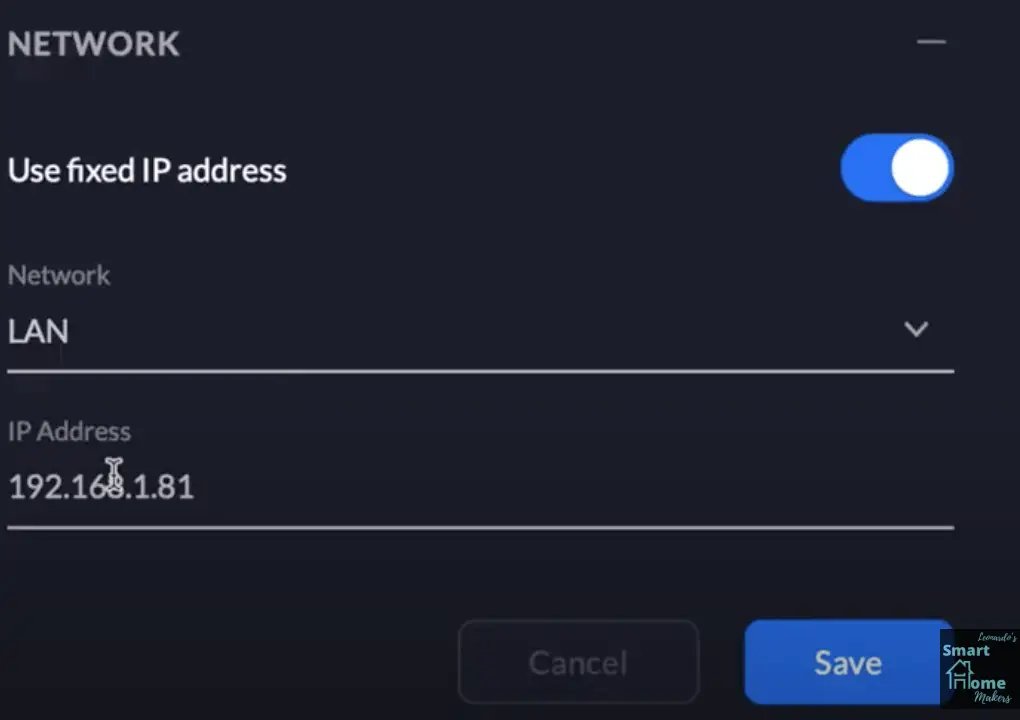
In order to interact with the PI we are going to need to find the IP address of it. This will be different based on which router you have at home. I use a Unifi setup, so I log into my Unifi controller, go to list of devices and look for the raspberry pi. If you can’t find it, try and look for the uptime. Once you have found the ip, mine is 192.168.1.81 you can set it to a fixed address (this is recommended but also an optional step).

My fixed IP address is 192.168.1.82, which I changed from the default address that was assigned to it.
INSTALL NODE-RED ON RASPBERRY PI
Open up a terminal on your pc and type the following:
ssh pi@192.168.1.82Replace your ip address instead of mine. Default password is raspberry.
Now we can install node-red, this will also install node.js for us
bash <(curl -sL https://raw.githubusercontent.com/node-red/linux-installers/master/deb/update-nodejs-and-nodered)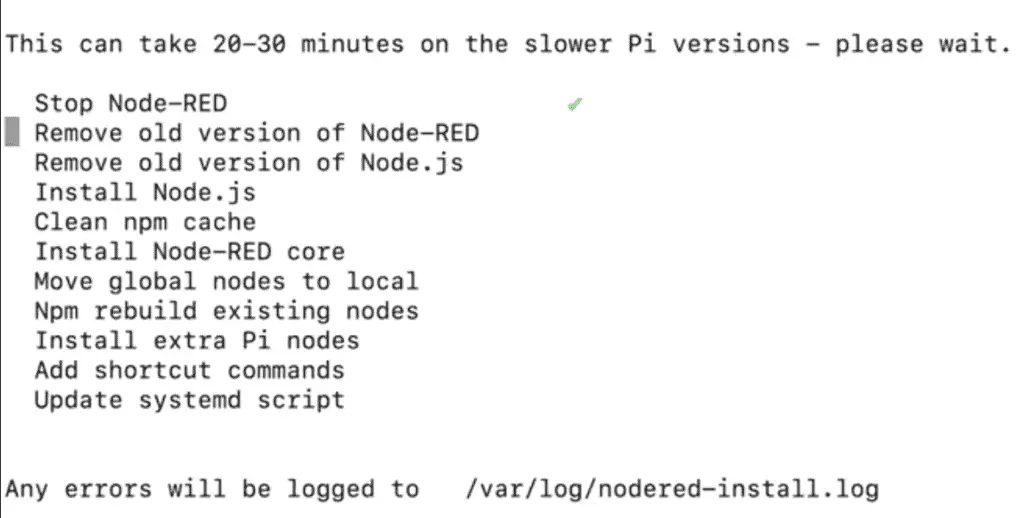
START NODE RED
To start node red we can do this in two ways:
- Start it manually each time ourselves
- Add it as a service
#Run manually
node-red-pi —max-old-space-size=256

#Add as a service
sudo systemctl enable nodered.service
You will only need one of the above, I would enable the service and the reboot the PI!
You should now see this on your screen with information about how to access node red.

To connect to node-red, open up a browser and type in the following:
http://{your_pi_ip_address}:1880 –> http://192.168.1.82:1880.
This is why it is important to have a fixed IP address, so this doesn’t change every time the PI reboots.
ADDING HOME ASSISTANT PALETTE TO NODE-RED
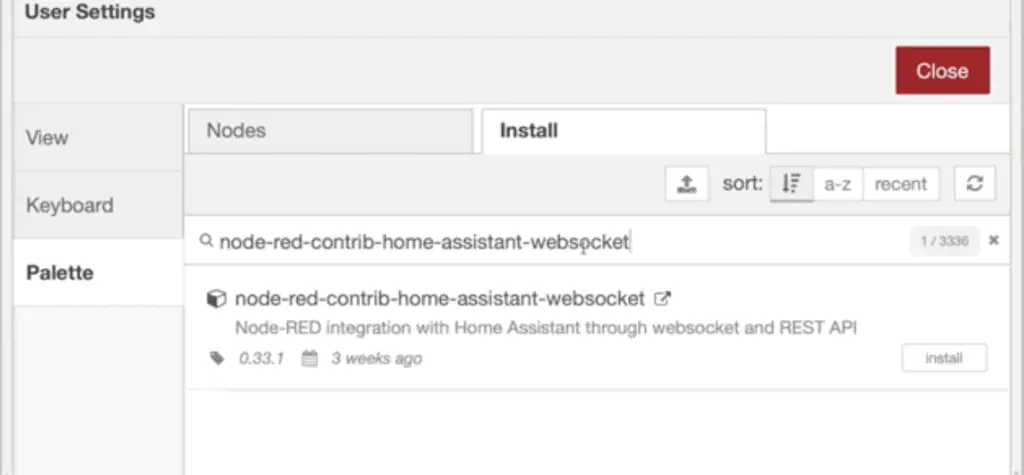
In node-red go to the settings menu on the right and click on manage pallette.
Go to the install tab and type this in: node-red-contrib-home-assistant-websocket
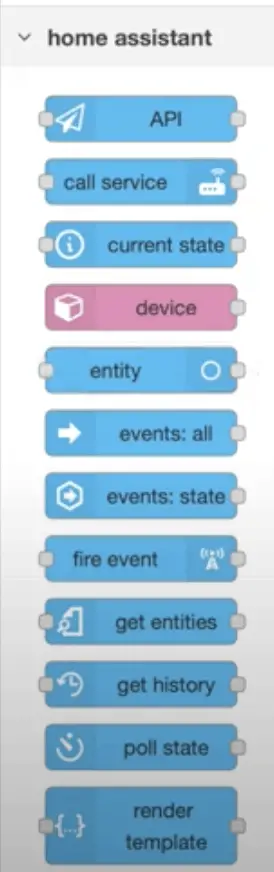
Now, on the left hand side you can see all the home assistant nodes. The ones I use are call service, current state, events all, events state.
CREATE A LONG-LIVED ACCESS TOKEN IN HOME ASSISTANT
To connect home assistant to node-red we need a long lived token.
- Go to home assistant click on your username.
- Scroll at the bottom click on create token.
- Give your token a name and copy & paste token somewhere safe.
Don’t share your token, if you think you did go ahead and delete it and generate a new one.

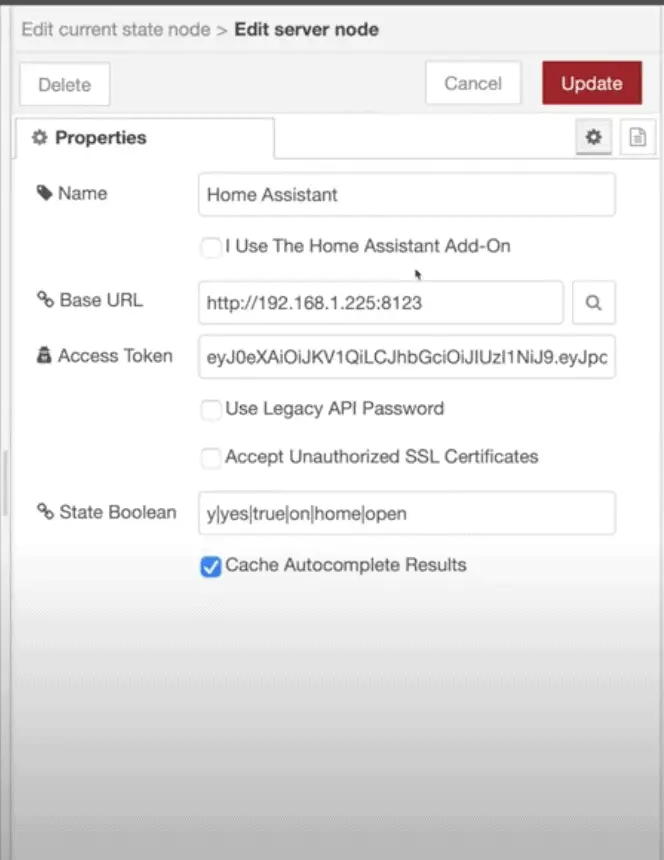
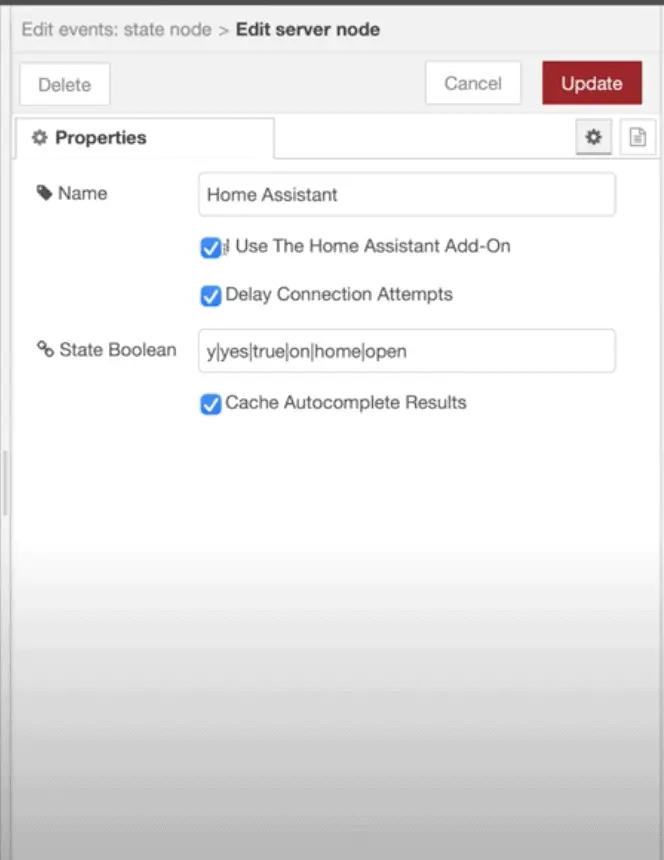
Now go to node-red and find a home assistant node, untick the “I use The Home Assistant Add-on” and input the following:
Base URL –> Your home assistant URL.
Access Token –> the token that we just generated.
IMPORT & EXPORT FLOWS FROM NODE RED
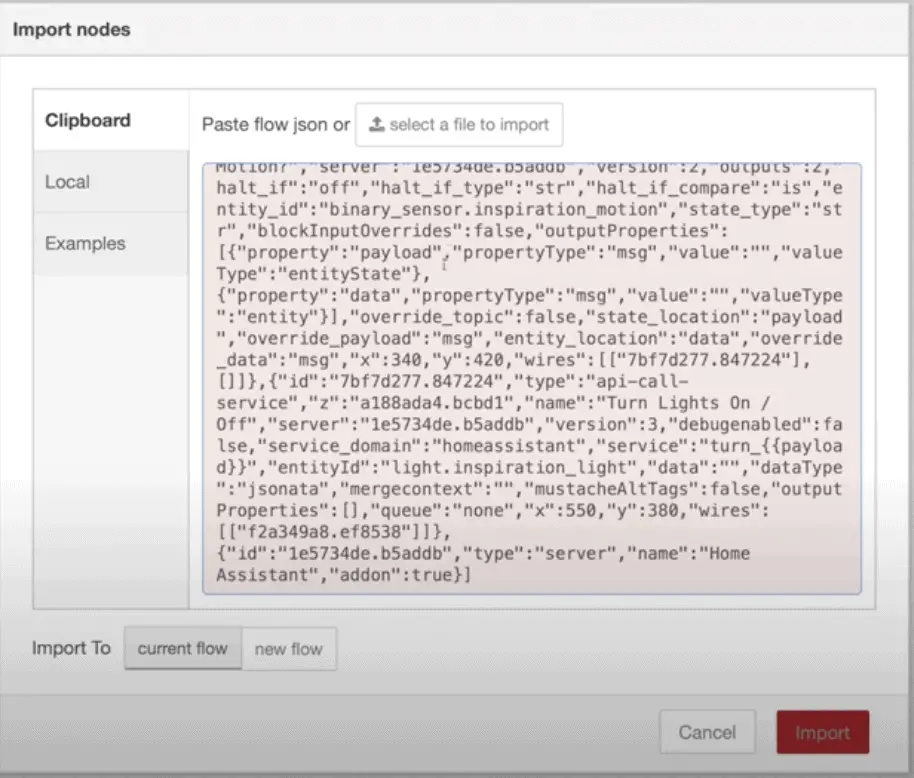
If you already have node-red installed, most probably on the home assistant add-on, I would export the flows and import them in the new system. Go to the settings menu, click export, click on JSON and copy to clipboard.
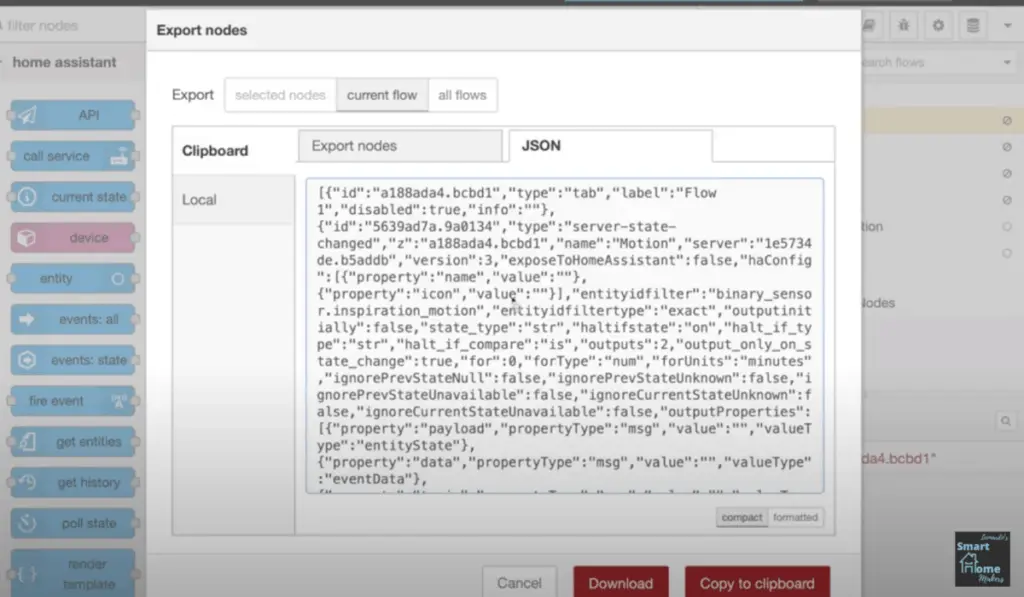
Now go to your new node-red system and go to the same menu, this time pick import and paste in the JSON.
Now at the end we need to do some cleanup.
First, click on a home assistant node and check to see if you have multiple servers or not. Delete the one linked to the add-on if you do have it.
Last point, you might need to add more palettes depending on what you had in your previous system.
SUMMARY
Now you should have a node-red system running on a raspberry pi, this pi will need to be always on for you to use node red. Feel free to remove the add-on from home assistant once you are confident in the new system.
Feel free to reach out, and let me know if your Node-red performance has improved or not, for sure home assistant will run quicker without the Node Red Add-on.
NODE RED COURSE
What to learn more about node red and how I use it in my home automation?